
Import availability by SKU
Use this importer to change location availability assignments by exact WooCommerce SKU. It does not directly change WooCommerce stock, Leanmerce On Hand/Reserved, Inventory Mode, routing, reservations or transfers. Changed assignments can still alter storefront availability, purchasability and available shipping/pickup methods.
Open Leanmerce > Availability > Inventory > Import availability by SKU.
Prepare the file
Download the CSV or XLSX template. The XLSX opens on a clean Import sheet and includes a separate Instructions sheet.
Row format headers are SKU, Location, Availability. Use one row per SKU/location. Matrix format starts with SKU; each following header is a location ID or exact current label.
Accepted values are:
available,yes, or1: save explicitly Available.unavailable,no, or0: save explicitly Unavailable.inherit: remove the explicit assignment. A variation then checks its parent assignment at that location before the applicable Product Default/fallback.
A blank matrix cell means no change. In row format, a blank Availability is invalid; do not use it to mean no change.
Find a SKU in the WooCommerce product/variation editor or Products list. Matching is exact after ordinary input trimming; do not assume leading zeros, internal spaces or punctuation will be repaired. Format SKU cells as text when a spreadsheet application might convert 00123 to 123.
Find a location’s permanent ID under Locations > Advanced. An exact current location name is also accepted, but a stable ID is safer for repeatable imports.
Example:
SKU,Location,Availability
DEMO-MUG-001,online,available
DEMO-MISSING,online,unavailable
DEMO-MUG-001,store-1,invalid-value
The valid first row can apply while the other rows are rejected. The operation is not all-or-nothing.
Documentation-side files are provided as a small valid/invalid example and a neutral 70-SKU matrix example. They are examples, not plugin-generated merchant data.
For the two-product example, use this exact documentation file only after replacing its fictional SKUs and locations with real merchant identifiers. The file does not create products or locations.
For about 70 SKUs, use a matrix only if the same location columns apply to every SKU. Keep one SKU per row, use stable location IDs as headers, leave no-change cells blank, and preserve SKUs as text. Do not duplicate the same product/location operation in one file.
Preview and apply
- Select the file and choose Validate / Preview.
- Confirm the screen says Import preview — nothing applied yet.
- Review Rows/items found, Valid changes, Unchanged, Unknown SKU, Duplicate SKU, Unknown location, Invalid availability, Skipped blank/no-change, and Errors / failed.
- Download the validation report. “Valid changes” means validated and not yet applied; “Changed” means persisted during processing.
- If valid changes exist, choose Apply import. Valid rows are processed even when other rows are invalid.
- Download the result report and open Import / Batch History for the stable Import ID, source/result files and audit rows.
Import limits: 10 MB per file, 50,000 row-format items or nonblank matrix operations, processing chunks of 100, and a visible preview of the first 100 items.
Rerunning an already-saved assignment reports it as unchanged. Other locations not named by the row or nonblank matrix cell remain unchanged.
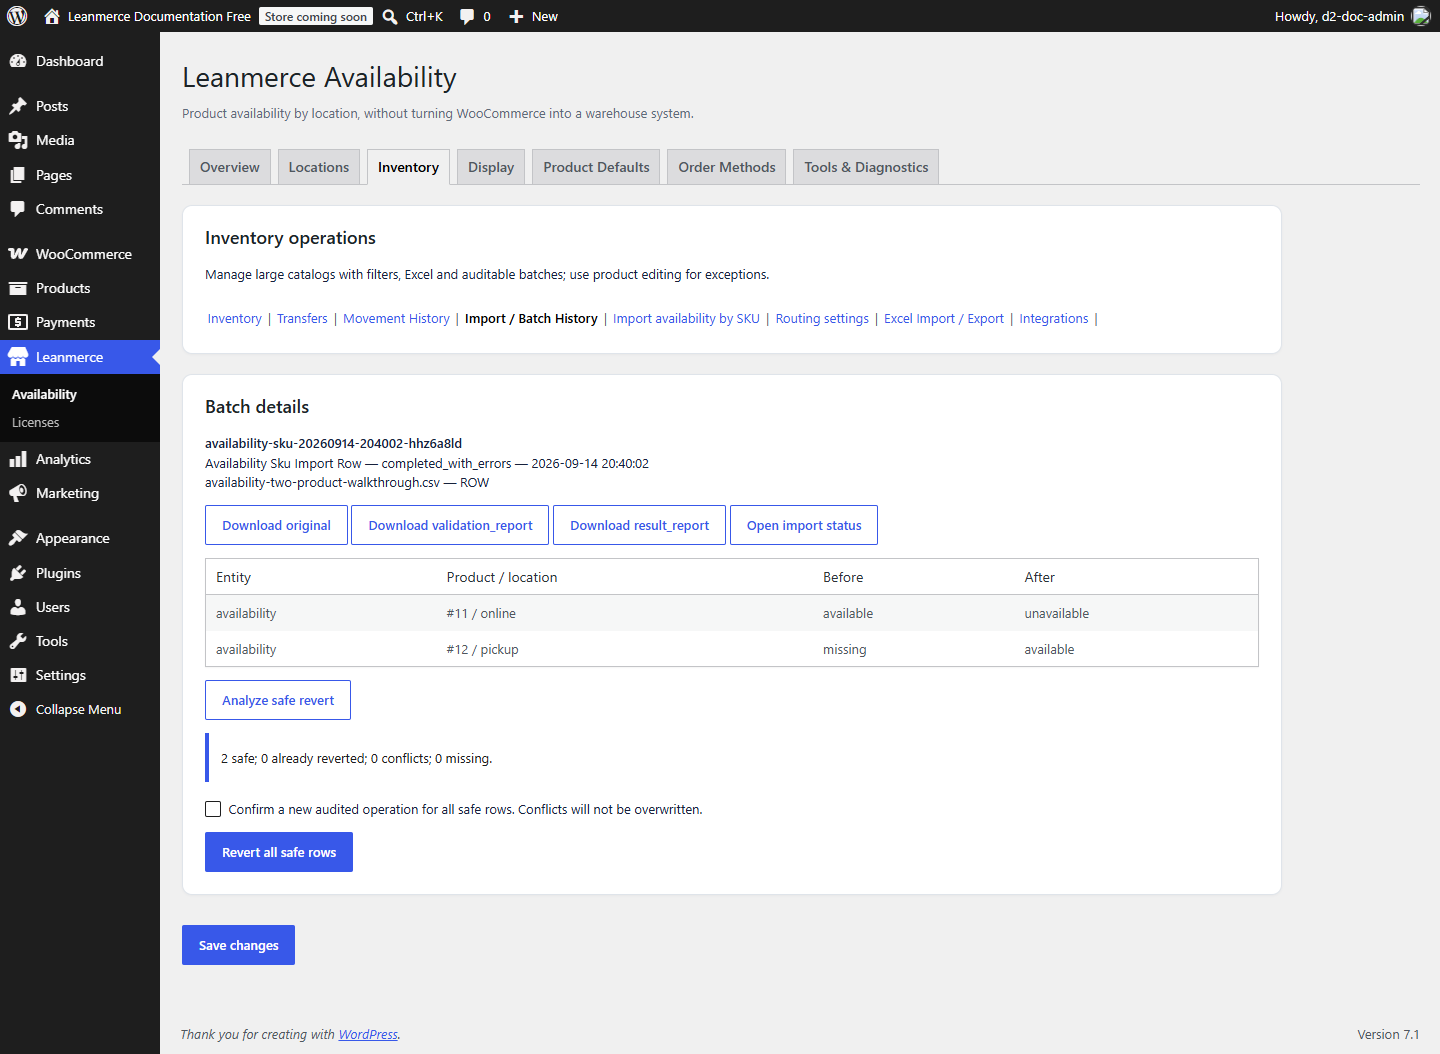
If processing stalls, use Resume stalled import only when the UI offers it. Cancel prevents remaining work; it does not undo already changed rows. From Batch History, Analyze safe revert checks whether current values still match the batch result. A confirmed revert creates a new audited operation for safe rows and does not overwrite conflicts.
Safe revert and recovery
- Open Inventory > Import / Batch History, then the Import ID.
- Click Analyze safe revert. Safe means the current value still equals this batch’s after-value. Already reverted, conflict and missing rows are excluded.
- Review the counts, tick the confirmation and click Revert all safe rows. A successful action must create a new audited operation; it never rewrites conflicts.
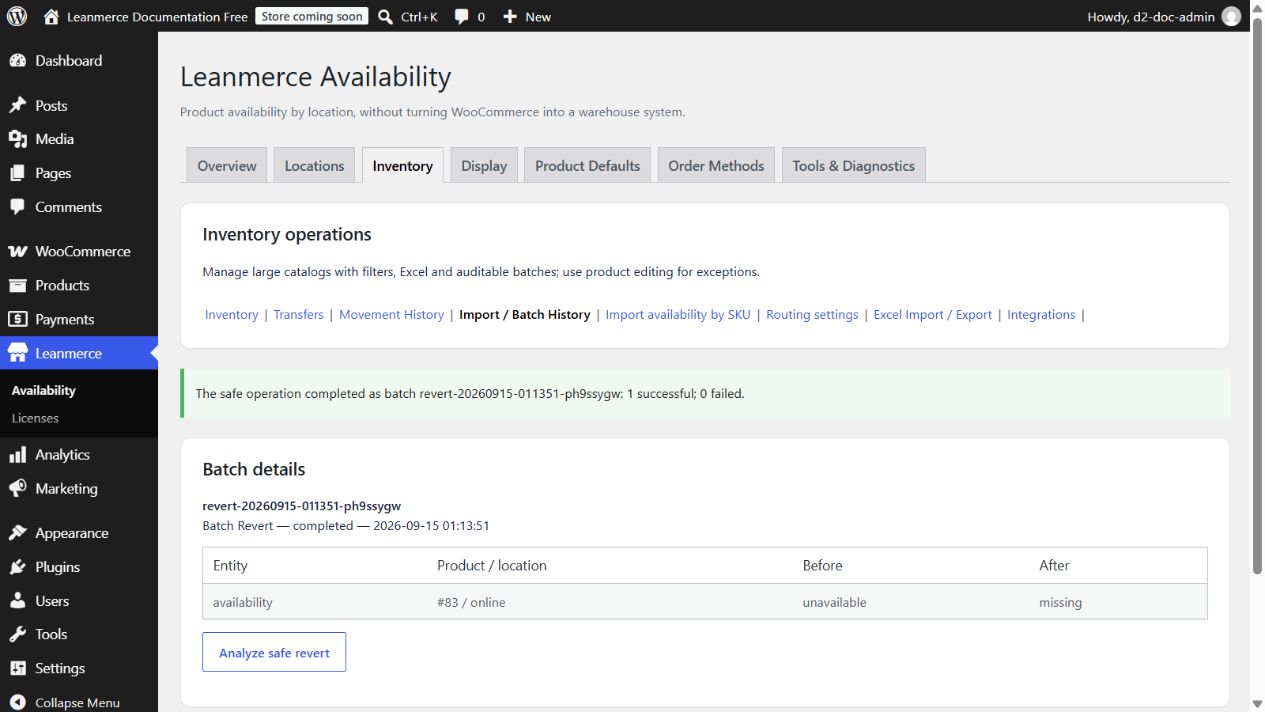
- After a safe revert, the interface redirects to the created result batch. Read the action-specific notice containing its Batch ID and successful/failed counters, then inspect the result rows.
- Reopen the affected products and confirm their explicit/missing states. If no safe rows remain, another analysis/action creates no zero-change batch.